It is the second part of the series about making your ember app more mobile-friendly. The first part was about adding Home Screen icons, Splashscreen, and controlling app shell display on mobile devices. This time, I want to write more about offline assets caching.
Offline caching - quick recap
Some offline caching techniques are available for many years. There is a standard browser cache, but this mechanism cannot be reliable as a browser can throw our cache out at any point in time. There is also an ApplicationCache interface to tackle this problem, but it is obsolete now, and you had to mind many gotchas along the way of using it. Fortunately, there is a new way that utilizes service workers to achieve the same goal.
What is a service worker?
In a nutshell, a service worker is a JavaScript script that runs in a separate thread in the browser. There is a standardized API designed to allow communication between your web application and its service workers. I strongly encourage you to look up for more information about this concept. Here are a few things you could achieve using those scripts:
- offline caching
- background syncing
- push notifications
- geo-fencing (I’d love to make a post about it in the future)
In this particular post, I’m writing about the first case, but stay tuned to my blog, the moar stuff about service workers is coming ;).
So, back to offline support, compared to the mentioned ApplicationCache, Service Worker API is way more complicated, but also way more powerful. The main difference is the flexibility that is given to us, we can programmatically control which assets and how will be cached.
How to use Service worker with Cache API
Before I go any further, it is worth mentioning that your application must be served over HTTPS. This is a requirement for service workers to work :).
I will shuffle with some code so you can get a general idea.
Register service worker
First, you have to register the script.
if ("serviceWorker" in navigator) {
  navigator.serviceWorker.register("sw.js").then(function (reg) {
    console.log("Service worker registered");
  }).catch(function (error) {
    // registration failed
    console.log("Registration failed with " + error);
  });
}
Service worker lifecycle
Service workers have two lifecycle events you can attach to: install, activate , and another fetch event that we will be using to serve cached assets.
Add things to cache
Part of the Service Worker API is a Cache Interface which provides a storage mechanism for your assets. You are responsible for handling cache updates/purge/etc.
Here is a simple example of how we could use the install event to cache assets.
self.addEventListener("install", (event) => {
  // wait until promise resolved/rejected
  event.waitUntil(
    // use cache store called v1
    caches.open("v1").then((cache) => {
      // Cache all these urls
      return cache.addAll([
        '/',
        '/index.html',
        '/css/index.css',
        '/js/index.js',
        '/img/image.png',
      ]);
    })
  );
});
Fetch things from cache
As we have something cached, we would like to use it somehow when the user visits
our application subsequent time. FetchEvent is dedicated to doing that. You can modify
the response to requests in any way you want using respondWith method, so it’s
basically a proxy to all requests.
self.addEventListener("fetch", (event) => {
  event.respondWith(
    // Return cached file if it exists
    caches.match(event.request).catch(() => {
      // no match found then fetch response from the network
      // at this stage you could also store following request's response
      // in the cache to prevent making round-trips to the network
      return fetch(event.request);
    });
  );
});
What about updates?
What if your service worker script changes? Simply, the new version of the service worker is installed in the background, but it could be not active yet. It is only activated when there are no longer any pages loaded that are still using the old version. That’s why it is a good practice to use a different cache store for the new version, let’s say “v2”. You should get rid of the old cache in “activate” lifecycle event when the new service worker takes control.
this.addEventListener("activate", function(event) {
  var cacheWhitelist = ["v2"];

  event.waitUntil(
    caches.keys().then(function(keyList) {
      return Promise.all(keyList.map(function(key) {
        if (cacheWhitelist.indexOf(key) === -1) {
          return caches.delete(key);
        }
      }));
    })
  );
});
Some helpers
The Above examples were framework agnostic and should give you some basic understanding of the whole idea.
And what’s more, there are some tools to simplify the process like sw-toolbox which provides caching
strategies, and sw-precache util to generate service-worker.js that precaches resources for you.
How to start offline caching in Ember.js app
You may think, finally some Ember stuff but I feel compelled to make the above introduction. Anyway, as in [the first post][first-part] I will be using SplittyPie application as an example.
Broccoli Service Worker
There is a great service worker generator which will ease our process a lot.
ember install broccoli-serviceworkerWhat this does is generate service-worker.js and add service worker register code to your index.html.
It uses the mentioned sw-toolbox library which helps with various caching strategies.
In order to enable this addon, add some configuration into app/config/environment.js file.
ENV.serviceWorker = {
  enabled: true,
  debug: true,
};
By default, it will add all Ember app resources (files in dist folder) as precached assets using
cache first strategy. Available cache strategies are described here.
In many applications, that could be the last step, although I had to make some further adjustments.
I’m using google fonts fetched directly from google CDNs and “history” location type.
See my current setup below.
ENV.serviceWorker = {
  enabled: true,
  debug: true,
  serviceWorkerFile: "offline-support.js",
  includeRegistration: false, // registering in app/initializers/offline-support
  precacheURLs: [
    "/app.html",
  ],
  fastestURLs: [
    { route: "/(.*)", method: "get", options: { origin: "https://fonts.gstatic.com" } },
    { route: "/css", method: "get", options: { origin: "https://fonts.googleapis.com" } },
  ],
  fallback: [
    "/(.*) /app.html",
  ],
};
I’m using a different preloader page for other than index page requests (app.html just showing “Loading Splittypie…”), that’s why the need of pre-cache this page and fallback if a user is offline. Additionally, you can see caching Google fonts using the “fastest strategy”. About cache strategies, you can read on sw-toolbox documentation.
Also, I’m not using the default registration code (includeRegistration: false), instead, I wanted to
have more control over the registration process to inform users about offline capability and
application updates. My offline-support initializer below.
import Ember from "ember";

const { log } = Ember.Logger;

export default {
  name: "offline-support",
  initialize(application) {
    const notify = application.__container__.lookup("service:notify");

    if ("serviceWorker" in window.navigator) {
      window.navigator.serviceWorker.register("/offline-support.js").then((registration) => {
        const isUpdate = !!registration.active;

        registration.onupdatefound = function () {
          registration.installing.onstatechange = function () {
            if (this.state === "installed") {
              if (isUpdate) {
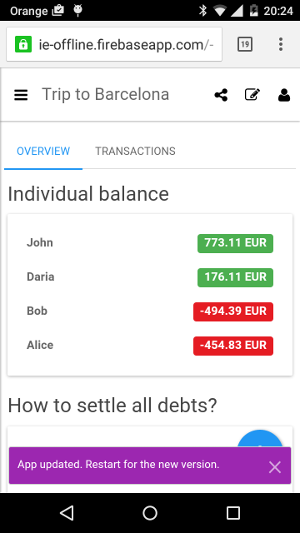
                notify.info("App updated. Restart for the new version.");
              } else {
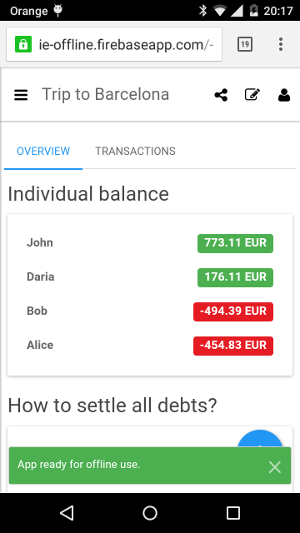
                notify.success("App ready for offline use.");
              }
            }
          };
        };
      }).catch((err) => {
        log(err);
      });
    }
  },
};

What’s next?
Unfortunately, my SplittyPie still doesn’t work without internet connection as I’m using firebase as a data layer. That’s why the next part is going to be about offline data access and synchronization.